
Airport security sounds simple, but the rules are not the same everywhere you fly.
They can change by country, airport, airline, route, scanner technology, and transit airport.
A small slip can mean extra screening, a confiscated item, a long delay, or a missed flight.
Here are 7 common mistakes to avoid before you fly, plus how to stay one step ahead.
1. Assuming Airport Security Rules Are the Same Everywhere
Because flying is international, it is easy to assume every airport follows the same rules. It does not work that way.
There are global baseline frameworks, but countries, airports, and even individual terminals can apply their own rules on top.
The clearest proof is how differently six well-known countries handle the same carry-on bag today.
International standards are not identical rules
- Bodies like the ICAO set baseline frameworks, not one fixed checklist.
- Individual nations and airport authorities can enforce their own protocols.
- An airline can also add limits on top of airport rules, so an item that clears security may still be refused at the gate.
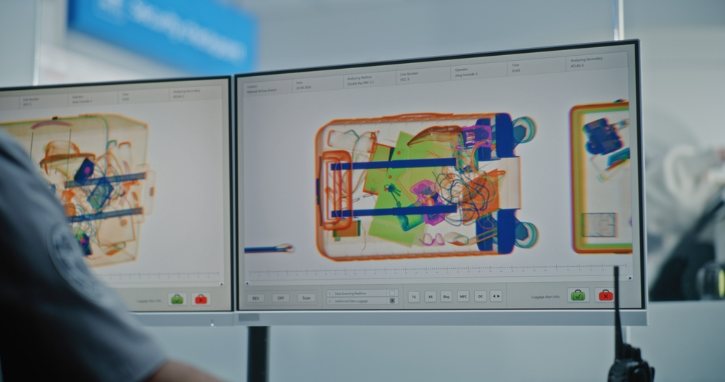
Scanner technology changes everything
- CT scanners (3D imaging) often let you keep liquids and electronics in your bag, and may allow larger liquids.
- Older 2D X-ray lanes usually require liquids and laptops to come out.
- This split can exist inside one airport. At Frankfurt, only some lanes had next-generation scanners, so your lane matters.
Six countries, six experiences
- United Kingdom: Heathrow, Gatwick, Edinburgh, Birmingham, and London City allow up to 2 liters per container, while Manchester, Luton, and others still use the 100 ml
- Italy: Rome Fiumicino, Milan Linate and Malpensa, and Naples allow larger liquids in their CT lanes, but the rest stays at 100 ml.
- Canada: the limit is still 100 ml nationwide, though CT lanes at airports like Vancouver and Calgary let you keep liquids and laptops in your bag.
- United States, Australia, and Japan: the strict 100 ml limit still applies, and in the US you usually still remove electronics, except in PreCheck lanes.
What to check before you go
- The rules for your departure, transit, and arrival
- Your airline and any connecting airline.
- Do not assume your outbound and return airports match.
2. Getting the Liquids Rule Wrong for Toiletries, Cosmetics, and Food
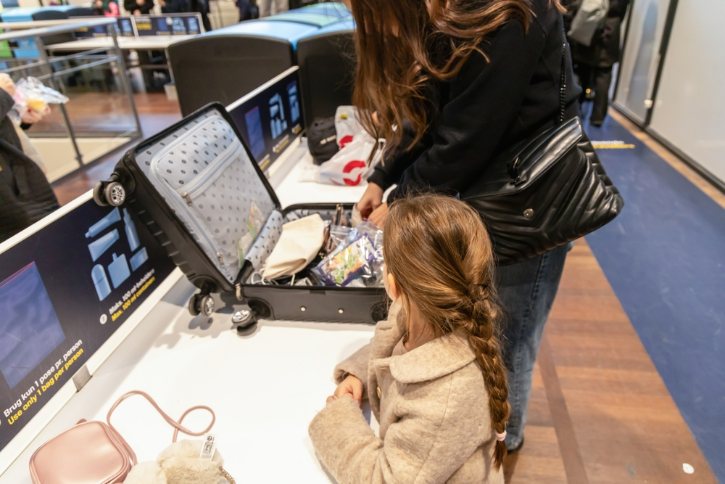
A few airports now allow bigger liquids, but the classic 100 ml container limit is still the default at most airports.
The common mistake is thinking about how much liquid is left in the bottle, when security cares about the size of the container.
The rule is about container size
- A 200 ml tube that is nearly empty still gets taken at a standard checkpoint.
- Staff judge the printed capacity, not the amount inside.
The clear bag still matters
- Liquids usually go in one clear, resealable bag, around 20 cm by 20 cm, 1 liter max.
- If it will not seal, or you carry more than one, the extra items are left behind.
Surprising items that count as liquids
- Cosmetics: perfume, foundation, lip gloss, toothpaste, hair gel, shaving cream, deodorant spray, hand sanitizer.
- Foods: jam, honey, peanut butter, yogurt, soup, syrup, dips, soft cheese.
- The test: if it can be spread, sprayed, poured, or squeezed, it counts.
Exemptions and smart packing
- Medicine, baby milk, baby food, breast milk, and dietary liquids may exceed the limit, but declare them and bring documents.
- Use travel-sized containers, and keep the liquids bag near the top of your carry-on.
- Unless an official website says otherwise, pack as if 100 ml applies.
3. Packing Power Banks and Lithium Batteries the Wrong Way
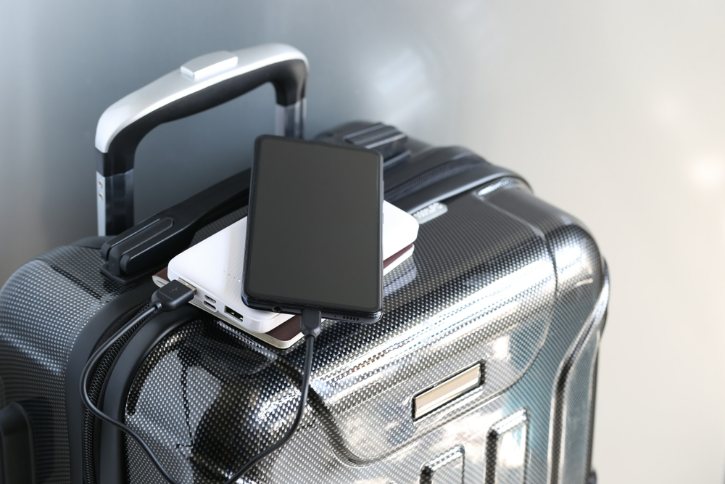
Lithium batteries get extra attention because a damaged one can catch fire quickly, and cargo hold systems struggle to stop it.
That is why spare batteries and power banks must travel in the cabin, never in checked luggage. The rules have tightened, so it pays to check yours.
Cabin only, and new limits
- The latest IATA Dangerous Goods Regulations are now in effect.
- Charging power banks from in-seat USB or outlets is generally not allowed in flight.
- Do not use a power bank during taxi, takeoff, and landing.
Many airlines ban in-flight use
- Over 20 carriers, including Lufthansa, Emirates, Singapore Airlines, ANA, Japan Airlines, Qantas, and Scoot, ban in-flight power bank use.
- Japan, India, and South Korea require them kept off and within reach.
Carrier rules now differ
- Japan Airlines and ANA: apan Airlines and ANA: up to two power banks total per passenger, each rated at 160 Wh or less.
- Singapore Airlines: power banks up to 100 Wh without approval, and 100 to 160 Wh with approval, limited to two.
- Qantas (Australia): up to 100 Wh as standard, with 100 to 160 Wh allowed only with approval, and no more than two of those.
- Emirates: one power bank up to 100 Wh per passenger, with no in-flight use or charging. The capacity label must be clear, and it stays with you rather than in the overhead bins.
- Qatar Airways: up to two power banks per passenger, with units up to 100 Wh permitted without approval and those between 100 and 160 Wh requiring approval.
- United: power banks must stay with you or under the seat, not in overhead lockers. You can bring up to two power banks, with a maximum capacity of 160 Wh
- Southwest: one power bank under 100 Wh, visible and under the seat.
- American and Delta: up to two chargers under 100 Wh, visible.
- Smart luggage: usually needs a removable battery or it may be refused.
Watt-hours and safe packing
- Under 100 Wh: generally fine in the cabin, no approval.
- 101 to 160 Wh: restricted, usually two max, needs airline approval.
- Over 160 Wh: not allowed.
- Keep the Wh label readable, and protect terminals with a box, pouch, or tape.
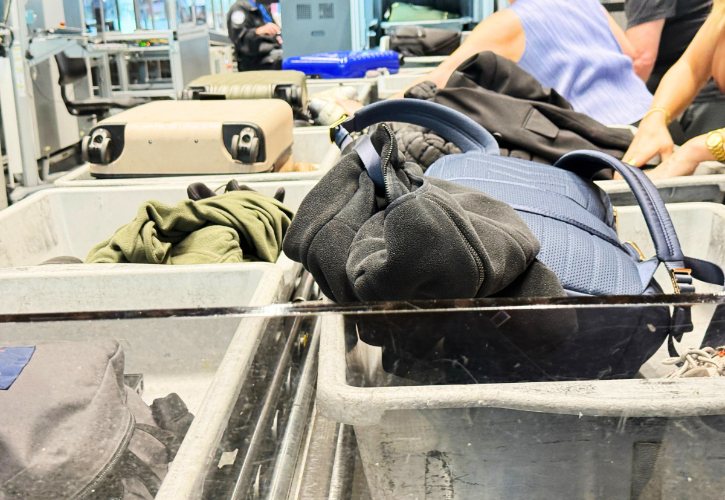
4. Forgetting to Prepare Electronics and the Security Tray
Electronics rules are changing, but not every airport has the new technology.
The mistake is preparing your bag the way the last airport wanted, while ignoring the signs at the checkpoint in front of you.
Always follow the signage and staff instructions for that lane.
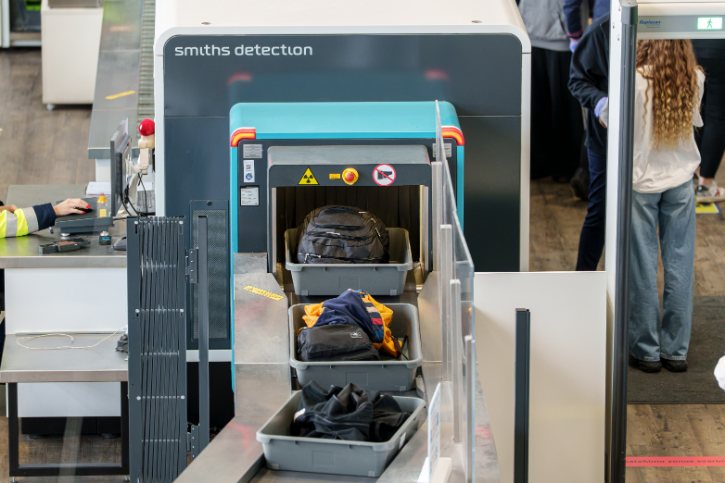
Old lanes versus CT lanes
- In older X-ray lanes, remove anything larger than a smartphone, with nothing on top or underneath.
- In CT scanner lanes, those items can often stay in the bag.
Devices may need to power on
- Officers in many countries can ask you to switch on a device.
- A dead battery can mean extra inspection or refusal, so charge devices before travel.
Common tray mistakes
- Leaving a passport loose in the tray
- Mixing electronics and liquids together
- Overloading one tray, rushing, or leaving valuables unattended
Pack for a smooth checkpoint
- Empty pockets of coins, keys, cards, and phone into a zippered pocket, not a loose tray.
- Keep electronics and liquids near the top of your carry-on.
- Allow extra time for camera gear, work devices, gaming gear, and drones.
5. Forgetting Duty-Free Liquid Rules on Connecting Flights

Buying duty-free after security does not give those liquids a free pass for the rest of the trip. The problem usually appears at a connecting airport, where you may face a second security check before your next flight.
Why duty-free is not a free pass
- Connecting passengers often exit the aircraft and clear security again.
- Liquids over 100 ml need to be sealed in an official Security Tamper-Evident Bag (STEB).
- A regular store plastic bag does not count.
What makes a valid STEB
- A tamper-evident seal that shows “VOID” if peeled, heated, or opened.
- The original receipt sealed inside, showing a recent date, often within 36 to 48 hours.
- The receipt should match your itinerary.
Where it can still go wrong
- Some countries do not recognize STEBs from certain places, or require their own scan.
- In the US, STEB liquids over 100 ml are allowed only if they pass special bottle scanners.
- Opening the bag mid-trip breaks the seal, and the item can be taken.
The last point of departure tip
- Buy large duty-free liquids at the final airport before your long flight, not the first.
- Ask the shop if the sealed bag will be accepted at your connecting airports.
- Keep it sealed, with the receipt inside, until your final destination.
6. Traveling With Medication, Medical Liquids, or Baby Items Without Preparing Properly

Security does make room for medical items, but the mistake is assuming no preparation is needed.
These items are often allowed over the 100 ml limit, yet they still need the right packaging and paperwork.
The bigger surprise is that clearing security is not the same as being allowed to bring a medicine into a country, and the rules differ a lot.
Allowed over 100 ml, but declare them
- Medicine, insulin, syringes, cooling packs, baby formula, breast milk can exceed the limit.
- Declare them at the start of screening and place them in a separate tray.
- Expect non-invasive checks of the containers and your hands.
Security clearance is not import approval
- A legal home prescription can be a controlled substance elsewhere.
- Keep essential medication in your carry-on, since checked bags can be delayed or lost.
- Check both the airport rules and the destination’s import rules.
How six countries handle it
- Japan: ADHD stimulants like Adderall are banned, along with codeine and pseudoephedrine. More than a month’s supply of permitted medicine needs an import certificate, the Yunyu Kakunin-sho, arranged in advance.
- Australia: you can usually bring up to a three-month supply, declared to the Border Force, in original packaging with a doctor’s letter. Schedule 8 drugs, such as ADHD stimulants and strong opioids, are stricter.
- United Kingdom: roughly three months is the general guide, but controlled drugs in larger amounts can need a personal licence applied for in advance, plus a doctor’s letter.
- Canada: controlled medicines are limited to about a 30-day or single-course supply, in labelled pharmacy packaging, and must be declared at customs.
- Italy: personal-use medicine is generally fine with a prescription, but controlled drugs need a certificate, including a Schengen certificate when traveling inside the Schengen Area, valid up to 30 days.
- United States: declare medication at customs, keep it in original labelled packaging, and carry it in your hand luggage.
How to prepare
- Carry original pharmacy packaging with your name, ingredients, and dosage.
- Bring a signed doctor’s letter confirming personal use.
- Apply early for any permit or certificate, since these take time.
7. Wearing Clothing and Accessories That Slow Security Screening Down
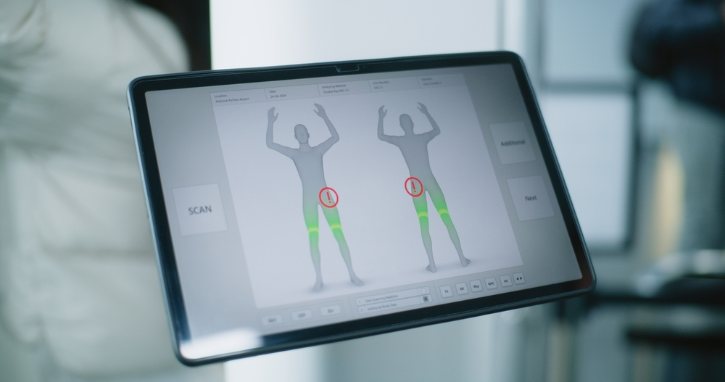
What you wear on travel days affects how smoothly you pass through. Metal-heavy or bulky, layered clothing tends to set off body scanners, which leads to pat-downs and delays. A few simple choices make the line move faster.
What triggers the scanner
- Metal items: large belt buckles, chunky jewelry, metal hair clips, watches, smartwatches, fitness trackers, and heavy zippers or rivets.
- Bulky outfits: oversized hoodies, heavy cardigans, structured blazers, and loose ponchos can give an unclear reading.
Footwear gets a closer look
- Heavy boots, high-tops, thick platform shoes, and high heels are often scanned separately.
- Shoe, jacket, and belt rules vary by airport and country.
Medical devices and your rights
- Tell officers about pacemakers or defibrillators before screening, and ask for a wand or pat-down.
- You can keep prosthetics, compression sleeves, and medical ports on, though they may be swabbed.
- You can request a private area for screening.
Religious headwear and dressing smart
- Hijabs, turbans, and yarmulkes can usually stay on, with a localized check if an alarm sounds.
- Wear simple shoes, minimal metal, and easy layers.
- Pack jewelry and put it on after security.
Worth Knowing: Don’t Underestimate Timing, Documents, and Transit Security Checks
Security is only one part of a much bigger process. You can still miss a flight when the security line is short, because check-in, immigration, customs, transfers, and boarding all take time.
Connections are where people get caught most often, and the rules differ by country.
Security is one of many steps
- Plan for check-in, bag drop, passport control, customs, transfers, and boarding.
- Lines spike during holidays, big events, early mornings, and busy hubs.
When you must re-screen, by country
- United States: there is no separate transit area. International arrivals must collect bags, clear customs, recheck, and go through security again, even for a domestic onward flight.
- Canada: major hubs like Toronto, Vancouver, Montreal, and Calgary offer US preclearance, so you clear US customs before you fly and arrive in the US as a domestic passenger.
- Italy: arriving into the Schengen Area from outside it means full passport control and re-screening.
- United Kingdom: hubs like Heathrow may need terminal transfers that send you back through security.
- Japan: hubs like Tokyo Narita and Haneda can require terminal or building transfers, with another security check.
- Australia: most travelers clear immigration and biosecurity on arrival, and some connections need a transit visa arranged in advance.
Document checks to clear
- Passport valid, meeting the six-month validity rule many countries require.
- The right visas, including any transit visa.
- Your name matching across boarding pass and documents, plus entry forms and onward proof.
Connection time and carry-on re-screening
- Carry-on items can be re-checked at the next checkpoint, including liquids, duty-free, and electronics.
- Minimum Connection Times of 60 to 90 minutes can feel tight with immigration, bag recheck, or terminal changes.
- Arrive earlier for international flights, and check airline and airport connection guides before booking tight layovers.
